
 Arushi Sachdeva
Handwritten Digits Recognition
In the news, the aspect of ML that surprises people most is its potential to perform human-like actions, e.g. driving cars or recognising number plates.
This project involves using the MNIST dataset of 70,000 pictures of handwritten digits (60,000 for training and 10,000 for testing), training a model to recognise them, and then making an app that recognises digits you draw yourself.
Now, decomposing the problem:
- Importing modules
- Importing the dataset
- Dataset preprocessing
- Training the model
- Testing the model
- Creating the app
Importing Modules
First we'll import the modules needed for the machine learning (keras, tensorflow and matplotlib):
import keras
from keras.datasets import mnist   # MNIST dataset
from keras.models import Sequential, load_model  # to construct CNN
from keras.layers import Dense, Dropout, Flatten
from keras.layers import Conv2D, MaxPooling2D
from keras import backend as K
import tensorflow as tf
import matplotlib.pyplot as plt # to construct the images laterimport keras
from keras.datasets import mnist # MNIST dataset
from keras.models import Sequential, load_model # to construct CNN
from keras.layers import Dense, Dropout, Flatten
from keras.layers import Conv2D, MaxPooling2D
from keras import backend as K
import tensorflow as tf
import matplotlib.pyplot as plt # to construct the images laterImporting the Dataset
Next, we'll import the dataset - loading it through Keras like this means it automatically comes split into the training and testing datasets.
# import the data
(x_train, y_train), (x_test, y_test) = mnist.load_data()
print(x_train.shape, y_train.shape)(60000, 28, 28) (60000,)
# import the data
(x_train, y_train), (x_test, y_test) = mnist.load_data()
print(x_train.shape, y_train.shape)(60000, 28, 28) (60000,)
Now we're all set to go!
Dataset Preprocessing
Next we'll process our dataset so that it's appropriate for our machine learning model (a convolutional neural network, or CNN) to process. First we reshape the samples into a better format:
num_classes = 10
x_train = x_train.reshape(x_train.shape[0], 28, 28, 1)   # reshape the training and testing dataset
x_test = x_test.reshape(x_test.shape[0], 28, 28, 1)
input_shape = (28, 28, 1)num_classes = 10
x_train = x_train.reshape(x_train.shape[0], 28, 28, 1) # reshape the training and testing dataset
x_test = x_test.reshape(x_test.shape[0], 28, 28, 1)
input_shape = (28, 28, 1)Then we convert the labels into one-hot vectors (e.g. the digit 3 becomes [0, 0, 0, 1, 0, 0, 0, 0, 0, 0]), and scale each pixel from the range 0-255 down to a decimal between 0 and 1, which helps the model train more smoothly.
# convert class vectors to binary class matrices
y_train = keras.utils.to_categorical(y_train, num_classes)
y_test = keras.utils.to_categorical(y_test, num_classes)
x_train = x_train.astype('float32')
x_test = x_test.astype('float32')
x_train /= 255
x_test /= 255# convert class vectors to binary class matrices
y_train = keras.utils.to_categorical(y_train, num_classes)
y_test = keras.utils.to_categorical(y_test, num_classes)
x_train = x_train.astype('float32')
x_test = x_test.astype('float32')
x_train /= 255
x_test /= 255Now we'll check that the samples are split properly into the training and testing dataset:
print('x_train shape:', x_train.shape)  # check shapes and samples numbers are correct
print(x_train.shape[0], 'train samples')
print(x_test.shape[0], 'test samples')x_train shape: (60000, 28, 28, 1) 60000 train samples 10000 test samples
print('x_train shape:', x_train.shape)  # check shapes and samples numbers are correct
print(x_train.shape[0], 'train samples')
print(x_test.shape[0], 'test samples')x_train shape: (60000, 28, 28, 1) 60000 train samples 10000 test samples
Training the Model
First we need to create our CNN: we'll do this using Keras and add layers as necessary:
model = Sequential()   # construct the model
model.add(Conv2D(28, kernel_size=(3,3), input_shape=input_shape))
model.add(MaxPooling2D(pool_size=(2, 2)))
model.add(Flatten())
model.add(Dense(128, activation=tf.nn.relu))
model.add(Dropout(0.2))
model.add(Dense(10,activation=tf.nn.softmax))
model.summary()Model: "sequential_1"
__________________________________________________________________
Layer (type) Output Shape Param #
==================================================================
conv2d_1 (Conv2D) (None, 26, 26, 28) 280
max_pooling2d_1 (MaxPooling2D) (None, 13, 13, 28) 0
flatten_1 (Flatten) (None, 4732) 0
dense_2 (Dense) (None, 128) 605824
dropout_1 (Dropout) (None, 128) 0
dense_3 (Dense) (None, 10) 1290
==================================================================
Total params: 607394 (2.32 MB)
Trainable params: 607394 (2.32 MB)
Non-trainable params: 0 (0.00 Byte)
__________________________________________________________________model = Sequential() # construct the model
model.add(Conv2D(28, kernel_size=(3,3), input_shape=input_shape))
model.add(MaxPooling2D(pool_size=(2, 2)))
model.add(Flatten())
model.add(Dense(128, activation=tf.nn.relu))
model.add(Dropout(0.2))
model.add(Dense(10,activation=tf.nn.softmax))
model.summary()Model: "sequential_1"
__________________________________________________________________
Layer (type) Output Shape Param #
==================================================================
conv2d_1 (Conv2D) (None, 26, 26, 28) 280
max_pooling2d_1 (MaxPooling2D) (None, 13, 13, 28) 0
flatten_1 (Flatten) (None, 4732) 0
dense_2 (Dense) (None, 128) 605824
dropout_1 (Dropout) (None, 128) 0
dense_3 (Dense) (None, 10) 1290
==================================================================
Total params: 607394 (2.32 MB)
Trainable params: 607394 (2.32 MB)
Non-trainable params: 0 (0.00 Byte)
__________________________________________________________________Then we compile our model.
model.compile(optimizer='adam', loss='categorical_crossentropy', metrics=['accuracy'])model.compile(optimizer='adam', loss='categorical_crossentropy', metrics=['accuracy'])After this we train our model and save it as mnist.h5.
model.fit(x=x_train,y=y_train, epochs=10)   # train the model using the training dataset
print("The model has successfully trained")
model.save('mnist.h5')
print("Saving the model as mnist.h5")Epoch 1/10 1875/1875 [==============================] - 32s 17ms/step - loss: 0.2098 - accuracy: 0.9369 Epoch 2/10 1875/1875 [==============================] - 31s 16ms/step - loss: 0.0860 - accuracy: 0.9735 Epoch 3/10 1875/1875 [==============================] - 32s 17ms/step - loss: 0.0610 - accuracy: 0.9808 Epoch 4/10 1875/1875 [==============================] - 30s 16ms/step - loss: 0.0437 - accuracy: 0.9853 Epoch 5/10 1875/1875 [==============================] - 30s 16ms/step - loss: 0.0359 - accuracy: 0.9882 Epoch 6/10 1875/1875 [==============================] - 28s 15ms/step - loss: 0.0290 - accuracy: 0.9901 Epoch 7/10 1875/1875 [==============================] - 29s 16ms/step - loss: 0.0243 - accuracy: 0.9917 Epoch 8/10 1875/1875 [==============================] - 28s 15ms/step - loss: 0.0210 - accuracy: 0.9923 Epoch 9/10 1875/1875 [==============================] - 29s 15ms/step - loss: 0.0197 - accuracy: 0.9927 Epoch 10/10 1875/1875 [==============================] - 29s 15ms/step - loss: 0.0174 - accuracy: 0.9938 The model has successfully trained Saving the model as mnist.h5
model.fit(x=x_train,y=y_train, epochs=10)   # train the model using the training dataset
print("The model has successfully trained")
model.save('mnist.h5')
print("Saving the model as mnist.h5")Epoch 1/10 1875/1875 [==============================] - 32s 17ms/step - loss: 0.2098 - accuracy: 0.9369 Epoch 2/10 1875/1875 [==============================] - 31s 16ms/step - loss: 0.0860 - accuracy: 0.9735 Epoch 3/10 1875/1875 [==============================] - 32s 17ms/step - loss: 0.0610 - accuracy: 0.9808 Epoch 4/10 1875/1875 [==============================] - 30s 16ms/step - loss: 0.0437 - accuracy: 0.9853 Epoch 5/10 1875/1875 [==============================] - 30s 16ms/step - loss: 0.0359 - accuracy: 0.9882 Epoch 6/10 1875/1875 [==============================] - 28s 15ms/step - loss: 0.0290 - accuracy: 0.9901 Epoch 7/10 1875/1875 [==============================] - 29s 16ms/step - loss: 0.0243 - accuracy: 0.9917 Epoch 8/10 1875/1875 [==============================] - 28s 15ms/step - loss: 0.0210 - accuracy: 0.9923 Epoch 9/10 1875/1875 [==============================] - 29s 15ms/step - loss: 0.0197 - accuracy: 0.9927 Epoch 10/10 1875/1875 [==============================] - 29s 15ms/step - loss: 0.0174 - accuracy: 0.9938 The model has successfully trained Saving the model as mnist.h5
Testing the Model
Now we can test our model on the 10,000 samples in the testing dataset, which it hasn't seen during training:
score = model.evaluate(x_test, y_test, verbose=0)  # run it on the testing dataset
print('Test loss:', score[0])
print('Test accuracy:', score[1])Test loss: 0.05444473773241043 Test accuracy: 0.986299991607666
score = model.evaluate(x_test, y_test, verbose=0)  # run it on the testing dataset
print('Test loss:', score[0])
print('Test accuracy:', score[1])Test loss: 0.05444473773241043 Test accuracy: 0.986299991607666
'Loss' indicates how far off the model's predictions were - since the loss is low and the accuracy is about 98.6%, the model seems pretty successful. We can output a random image from the testing dataset and put this to the test.
image_index = 2385    # chose random image in the testing dataset and show what the model predicts it to be.
plt.imshow(x_test[image_index].reshape(28, 28),cmap='Greys')
predict = x_test[image_index].reshape(28,28)
pred = model.predict(x_test[image_index].reshape(1, 28, 28, 1))
print(pred.argmax())1/1 [==============================] - 0s 305ms/step 0
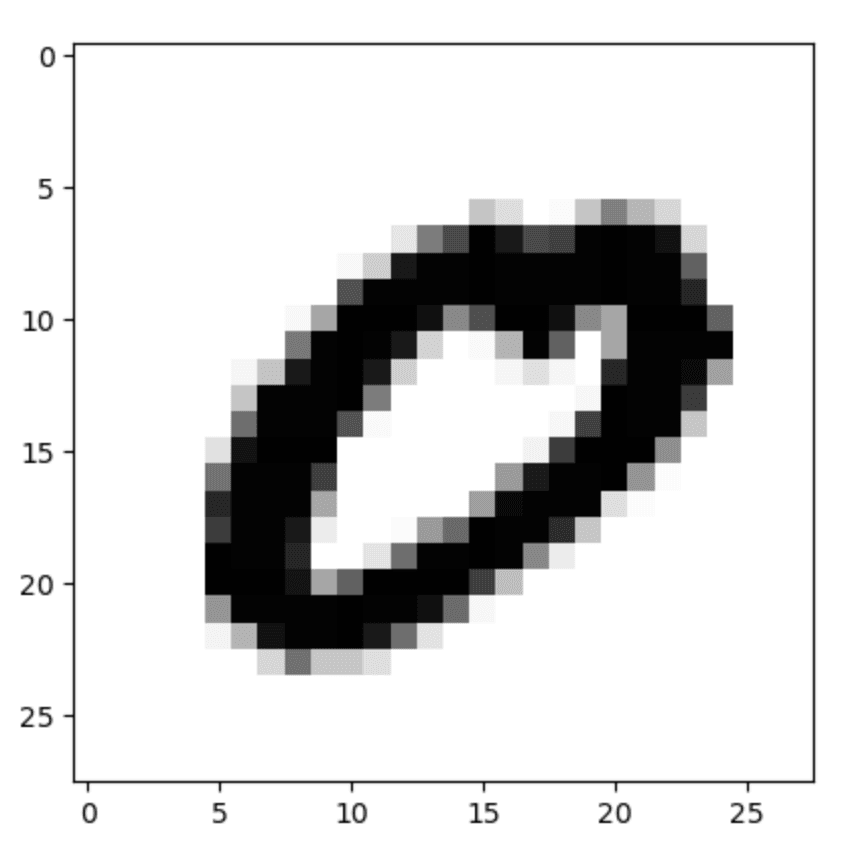
image_index = 2385    # chose random image in the testing dataset and show what the model predicts it to be.
plt.imshow(x_test[image_index].reshape(28, 28),cmap='Greys')
predict = x_test[image_index].reshape(28,28)
pred = model.predict(x_test[image_index].reshape(1, 28, 28, 1))
print(pred.argmax())1/1 [==============================] - 0s 305ms/step 0
The image is a handwritten 0, and the model correctly predicts 0.
Creating the App
Often people make apps like this in Python using Tkinter together with win32gui, but since win32gui is only available on Windows, we'll stick to an implementation that just uses Tkinter and Pillow.
First we'll import the modules the app needs:
import tkinter as tk   # import the modules needed to create the 'app'
from tkinter import *
from PIL import ImageGrab, Image
import numpy as npimport tkinter as tk # import the modules needed to create the 'app'
from tkinter import *
from PIL import ImageGrab, Image
import numpy as npNext we'll load our saved model and assign it to the object 'model':
model = load_model('mnist.h5') # load our modelmodel = load_model('mnist.h5') # load our modelWe will then create a function we can use to predict digits within the app using our model.
def predict_digit(img):
    img = img.resize((28,28))      # resize image drawn to 28x28 pixels
    img = img.convert('L')         # convert rgb to grayscale
    img = np.array(img)
    img = img.reshape(1,28,28,1)   # reshaping to support model input
    img = img/255.0
    res = model.predict([img])[0]  # predicting the class
return np.argmax(res), max(res)def predict_digit(img):
img = img.resize((28,28)) # resize image drawn to 28x28 pixels
img = img.convert('L') # convert rgb to grayscale
img = np.array(img)
img = img.reshape(1,28,28,1) # reshaping to support model input
img = img/255.0
res = model.predict([img])[0] # predicting the class
return np.argmax(res), max(res)Then we create our app. We create the basic components and the grid using Tkinter, and assign functions to each of the buttons.
class App(tk.Tk):   # the class to create our app
    def __init__(self):
        tk.Tk.__init__(self)
        self.x = self.y = 0
        # Create canvas for drawing and label for classification
        self.canvas = tk.Canvas(self, width=300, height=300, bg = "white", cursor="cross")
        self.label = tk.Label(self, text="Thinking...", font=("Times", 48))
        # Create buttons for clearing grid and initialising classification
        self.classify_btn = tk.Button(self, text = "Recognise", command = self.classify_handwriting)
        self.button_clear = tk.Button(self, text = "Clear", command = self.clear_all)
        # Grid structure
        self.canvas.grid(row=0, column=0, pady=2, sticky=W, )
        self.label.grid(row=0, column=1,pady=2, padx=2)
        self.classify_btn.grid(row=1, column=1, pady=2, padx=2)
        self.button_clear.grid(row=1, column=0, pady=2)
self.canvas.bind("<B1-Motion>", self.draw_lines)class App(tk.Tk): # the class to create our app
def __init__(self):
tk.Tk.__init__(self)
self.x = self.y = 0
# Create canvas for drawing and label for classification
self.canvas = tk.Canvas(self, width=300, height=300, bg = "white", cursor="cross")
self.label = tk.Label(self, text="Thinking...", font=("Times", 48))
# Create buttons for clearing grid and initialising classification
self.classify_btn = tk.Button(self, text = "Recognise", command = self.classify_handwriting)
self.button_clear = tk.Button(self, text = "Clear", command = self.clear_all)
# Grid structure
self.canvas.grid(row=0, column=0, pady=2, sticky=W, )
self.label.grid(row=0, column=1,pady=2, padx=2)
self.classify_btn.grid(row=1, column=1, pady=2, padx=2)
self.button_clear.grid(row=1, column=0, pady=2)
self.canvas.bind("<B1-Motion>", self.draw_lines)The first function draw_lines() will allow the user to draw digits on the canvas.
    def draw_lines(self, event):
        self.x = event.x
        self.y = event.y
self.canvas.create_oval(self.x-8, self.y-8, self.x + 8, self.y + 8, fill='black') def draw_lines(self, event):
self.x = event.x
self.y = event.y
self.canvas.create_oval(self.x-8, self.y-8, self.x + 8, self.y + 8, fill='black')Our next function, clear_all() will simply clear the screen.
    def clear_all(self):
self.canvas.delete("all") def clear_all(self):
self.canvas.delete("all")We can then create the next function, classify_handwriting(), which will take a screenshot of the canvas with the digits drawn by the user, before using the predict_digits() function to classify the digit.
    def classify_handwriting(self):  # takes screenshot of canvas and classifies image
        x, y = (self.canvas.winfo_rootx(), self.canvas.winfo_rooty())
        width, height = (self.canvas.winfo_width(), self.canvas.winfo_height())
        a, b, c, d = (x, y, x+width, y+height)
        im = ImageGrab.grab(bbox=(a,b,c,d))
        digit, acc = predict_digit(im)
self.label.configure(text= str(digit)+', '+ str(int(acc*100))+'%') def classify_handwriting(self): # takes screenshot of canvas and classifies image
x, y = (self.canvas.winfo_rootx(), self.canvas.winfo_rooty())
width, height = (self.canvas.winfo_width(), self.canvas.winfo_height())
a, b, c, d = (x, y, x+width, y+height)
im = ImageGrab.grab(bbox=(a,b,c,d))
digit, acc = predict_digit(im)
self.label.configure(text= str(digit)+', '+ str(int(acc*100))+'%')That makes our app. Finally, we can run this app to see how it looks.
app = App()
mainloop()app = App()
mainloop()Naturally, the output varies slightly based on the OS:
macOS:
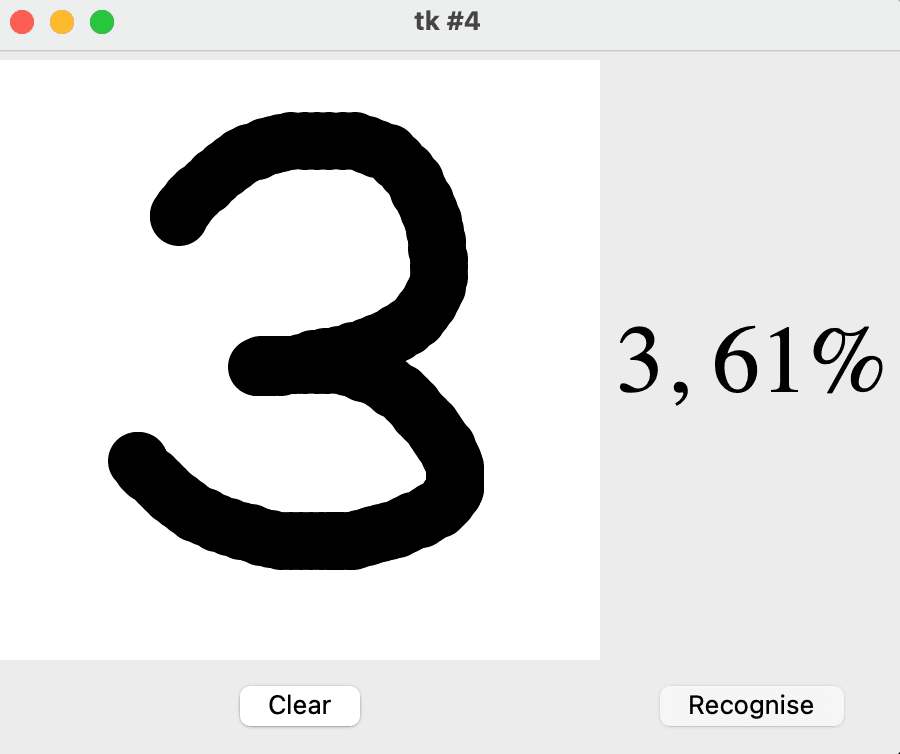
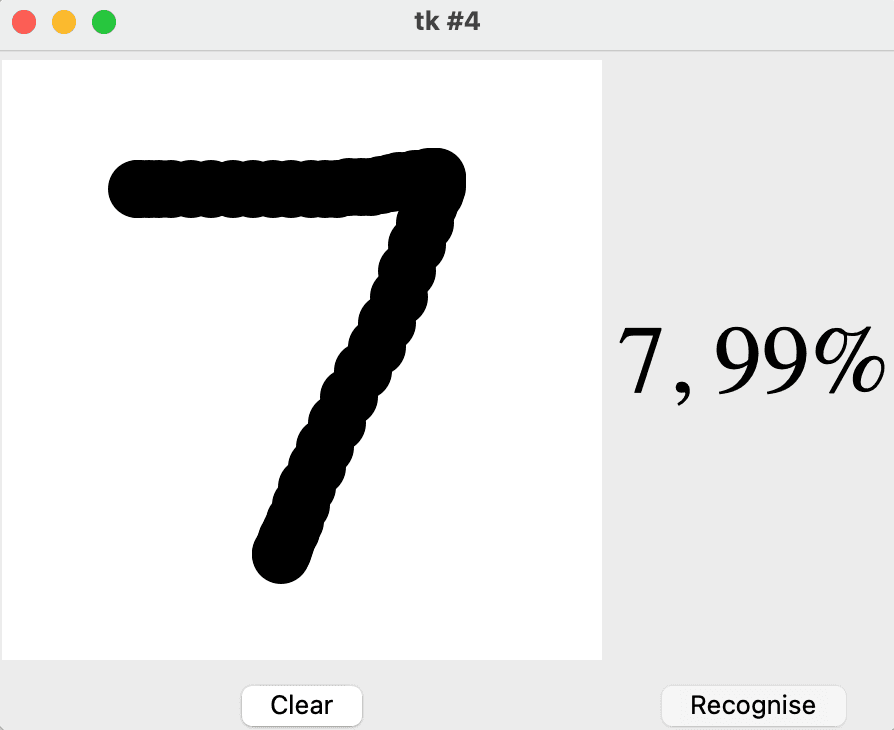
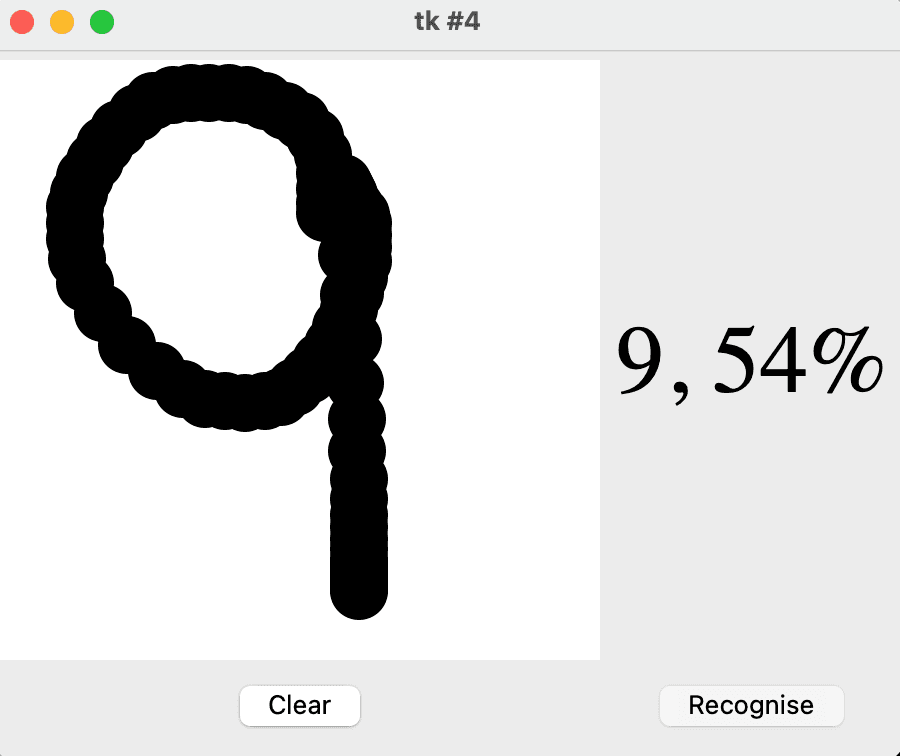
Windows:
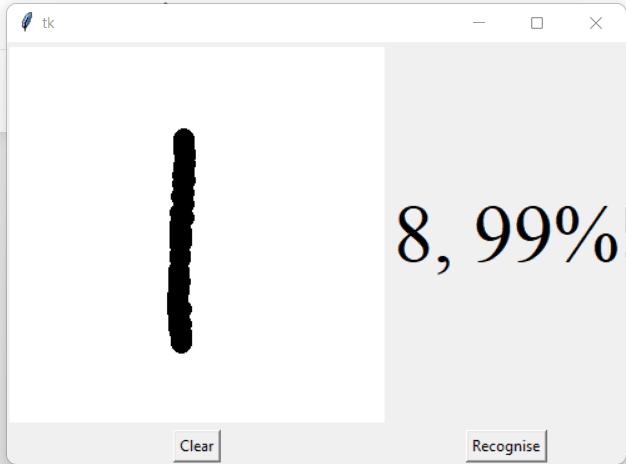
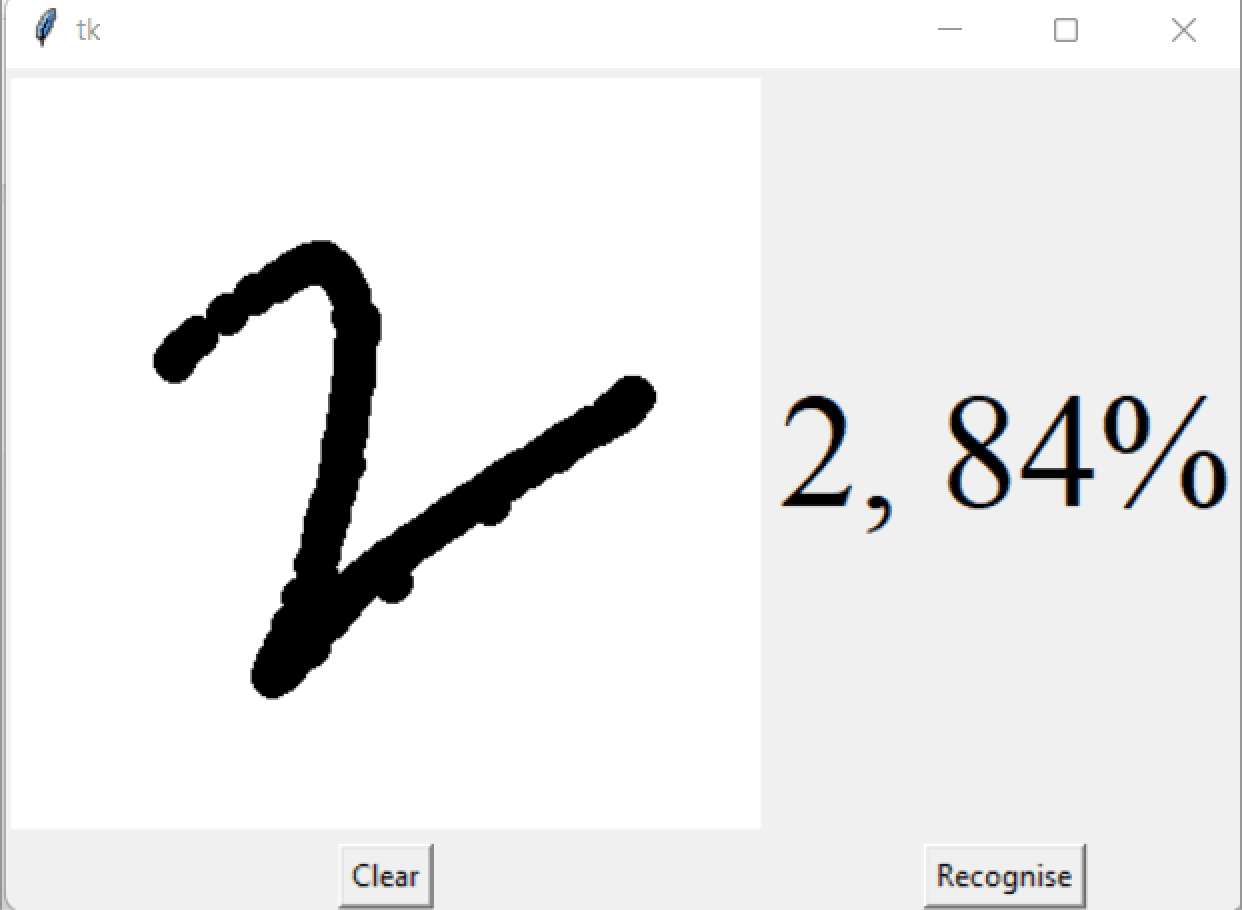
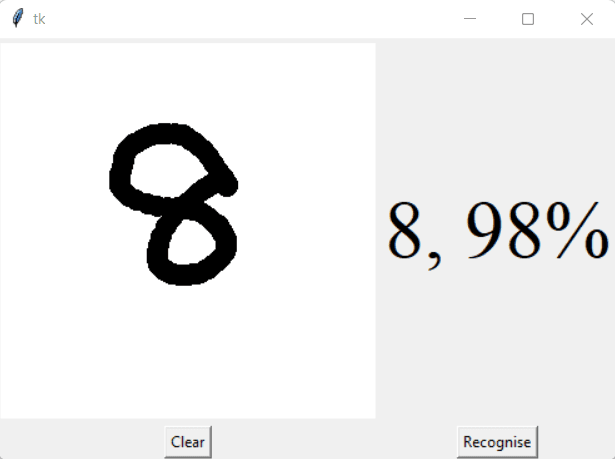
But either way, it looks fine! Thanks for reading - I hope this helps, and don't forget to check out the full source code on GitHub too!